On the Nature of Lenses and the Rationale for Focus Stacking
Diffraction-limited Photography
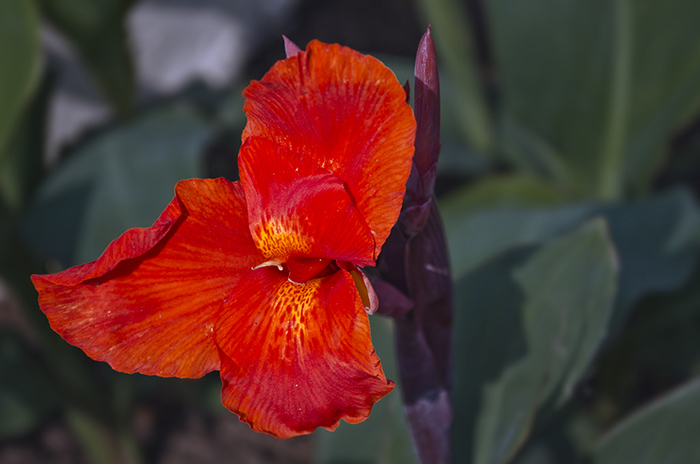
Depth of field is a powerful compositional tool in the arsenal of the landscape photographer. Some photographs, such as the macro below, merit the use of a shallow depth.
However, in other photographs, a sharp foreground, midground, and background make for a stronger composition.
In homage to “…the qualities of clearness and definition of the photographic image which is an important element in the work of members of this Group,” the photographic legends Ansel Adams, Willard Van Dyke, and Edward Weston (among others) formed the Group f/64, a reference to the very narrow aperture required of great depth of field medium format photography.
Depth of field is a function of sensor size, aperture size, and lens focal length: Cameras with smaller sensors produce images with greater depth of field, as do smaller apertures and shorter focal lengths. For most photographers, an increase in depth of field is effected by stopping-down a lens. But, a tradeoff of small apertures is longer exposure times. Some photographers utilize special lenses called perspective-control (Nikkor PCI-e lenses) or tilt-shift (Canon TS), so named because of their ability to literally tilt and shift independent of the camera body to which they are attached. With normal lenses, objects at identical distances from the camera are focused equally. However, by shifting the plane of the lens relative to the plane of the image, objects at different distances can be rendered in sharp focus. This allows for both foreground and background focus at relatively wide apertures. However, tilt-shift lenses cost thousands of dollars and are generally not the mainstay of the photographer’s gear. So, for most of us, great depth of field can come at a price.
Most lenses have an optical sweet spot, a range of apertures over which they are optimally sharp that spans from a stop or two below their widest aperture to around f/8 or f/11. Images shot outside this range of apertures are liable to appear soft. When stopping down below f/8 or f/11, one has to be especially careful of the effects of diffraction. Diffraction is an optical phenomenon in which light waves that are “squeezed” through a small opening (such as a diffraction slit or camera lens aperture) interact to produce peaks and troughs of light intensity made manifest as bands on an image. Ansel Adams, in his book “The Camera,” offers this caveat: “The photographer should be aware of this effect because, with diffraction causing some loss of sharpness at small apertures, and certain aberrations (see below) degrading image quality at large stops, a lens usually gives its best image quality somewhere near the middle of its aperture range. If necessary, test photographs can be made to determine the aperture that gives optimum quality.” Diffraction is a function only of the size of the aperture, not of the camera’s megapixel count or sensor format. However, cameras with smaller pixel pitches (higher pixel densities such as most compact point-and-shoots) will become diffraction limited wider open (at lower f-numbers) than those with lower pixel densities (such as the D3s, for instance). However, note that small sensor cameras, do their greater depth field, do not require to be stopped-down as much as large sensor cameras.
Diffraction can prove quite challenging to the landscape photographer who utilizes large sensor formats (such as APS-C, 35mm full-frame, and above)–stopping down to f/16 or f/22 will produce images that have great depth of field, but low resolution (due to losses suffered at the hands of diffraction). To circumvent this issue, one can utilize a technique called Focus Stacking, in which multiple exposures of a scene are obtained at an aperture of f/8, each differing from the other by focusing on a different focal plane. These different focal planes may then be fused together through the use of layer blending in such image editing programs as Photoshop and the GIMP.
Focus Stacking
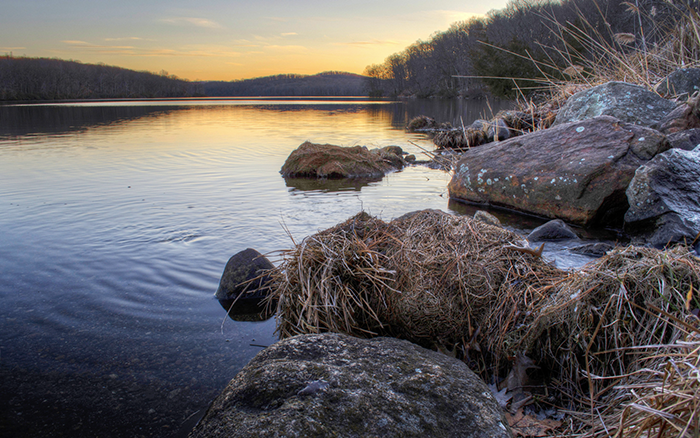
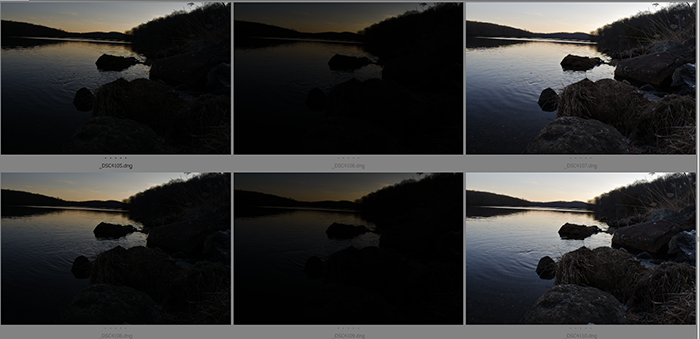
I utilized just such a technique recently. On this particular occasion, I found myself along the rock-encrusted, reed-embroidered banks of a lake, staring into the tranquil, dusky eyes of a mesmerizing sunset. Sporting a sky alive with bright, yet subtle gradations of color from fiery orange to cyan and a foreground of cooler, softer shadow, this was a scene that demanded not one, but six different exposures (depicted below)! Here’s why. Firstly, the character of the foreground’s microflora– the texture of the pebbled lake-bottom, the variegated, spaghetti-like whorls of the dried sage grass–impelled great optical depth of field. Secondly, the high luminosity of the eventide sky and the comparatively tenebrous foreground necessitated high dynamic range (HDR) photography. I decided on a depth-maximizing aperture of f/13 and a three shot HDR bracket, with each shot separated by 2 E.V. (exposure values or stops). Setting the focus point to single-point autofocus, for the first HDR set of three shots, I then focused on the foreground and fired a burst into the sunset, while for the latter HDR set, I moved the focus point up to the horizon. Note: it is absolutely imperative that the camera be mounted on a tripod for optimal photographic image fidelity. However, in this particular instance, lacking a tripod, I handheld the camera–a potentially major faux pas were it not for the image-stabilization offered by the lens and the error-free alignment (not something you want to bet the farm on) of these misaligned photos in Photoshop.
After aligning the photos, I created two HDR tone-mapped images from this set of six.

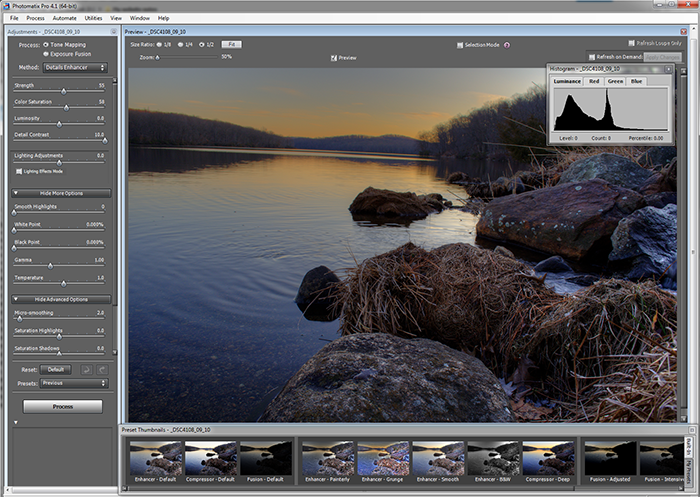
One tone mapped image had the foreground in focus, while the other set had the background in focus. These two images were then imported into Photoshop as layers.
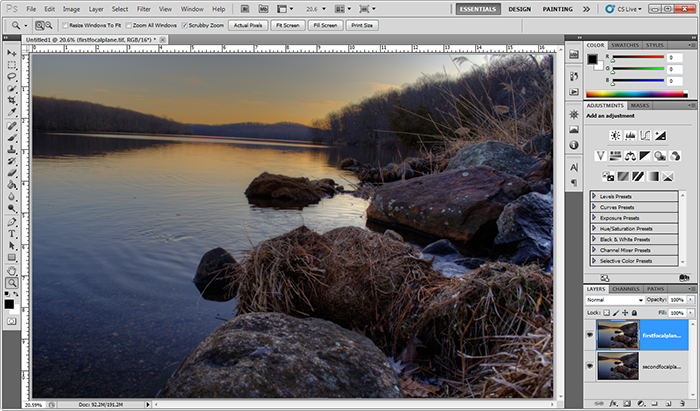
In my case, the layer with the background in focus was at the top. First, I selected both layers, then navigated to Edit->Auto align layers (this step was necessitated because of my lack of a tripod). With the layers aligned, next, I created a layer mask for the top layer, filled it with white, and painted in black over the foreground in order to opacify it.
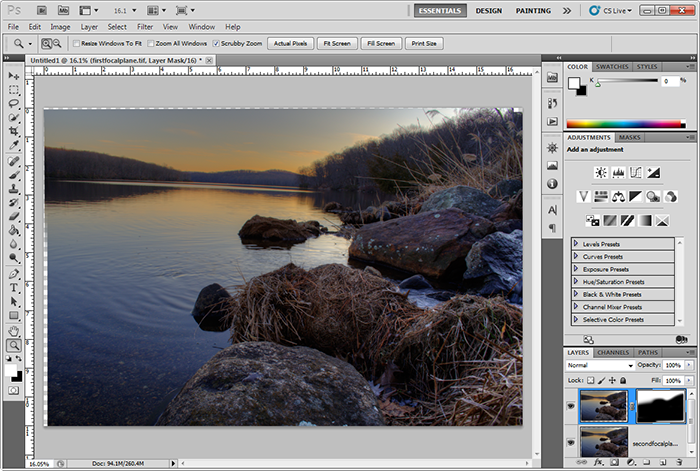
Finally, local hue/saturation, curves, levels, and brightness/contrast adjustments were performed, resulting in a sharp, bright, image with optical depth of field one would be hard-pressed to obtain were it not for Focus Stacking.